
Contents
Ceiling Water Damage can start with a faint stain or a soft, sagging panel, but the real risk often hides above the surface. You need to spot the signs, trace the leak, and stop the source before you touch the repair. If you miss hidden mold, rot, or trapped moisture, the damage can spread fast and return after patching. The next steps show you how to inspect, dry, and restore the ceiling correctly.
Key Takeaways
- Watch for ceiling water damage signs like staining, bubbling paint, sagging drywall, musty odors, and soft spots.
- Find the leak source by checking roofs, flashing, plumbing lines, HVAC pans, and nearby fixtures for moisture or corrosion.
- Stop the leak fast by shutting off water, protecting belongings, and containing drips with buckets or plastic sheeting.
- Inspect for hidden damage after drying, including mold, rot, swollen framing, and deterioration behind the ceiling surface.
- Dry, repair, and prevent future damage with dehumidifiers, stain-blocking primer, drywall replacement, and regular maintenance.
Spot the Signs of Ceiling Water Damage
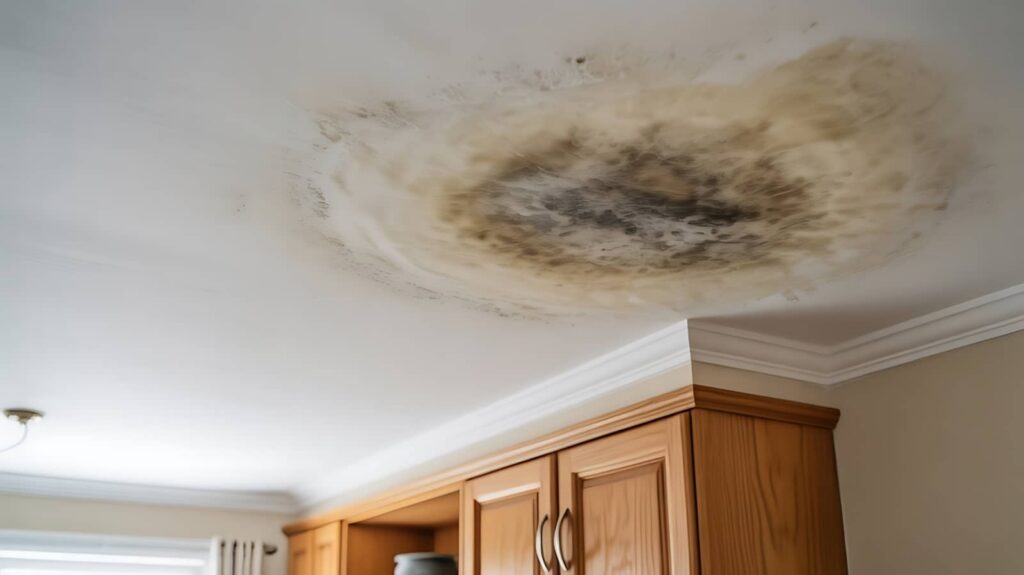
Ceiling water damage often shows up as discoloration, bubbling paint, sagging drywall, or a faint musty odor, and these warning signs usually mean moisture has already penetrated the ceiling assembly.
You should inspect for yellow-brown rings, crisp paint edges, hairline cracks, and soft spots that flex under light pressure.
Ceiling water damage may also present as peeling tape at joints, swollen trim, or localized staining around fixtures.
Use steady light to view the surface from multiple angles, because subtle changes in sheen can reveal hidden intrusion.
If you spot active drips, call a qualified restoration team right away. You’re not overreacting; you’re protecting your home, your health, and the community feel of a safe, dry space.
Find the Leak Source Before Repair
Before you repair ceiling water damage, inspect adjacent fixtures, pipes, and roof penetrations to identify the active leak.
You should trace the water path from the stained area to the highest visible point of intrusion, since water often travels before it drips through the ceiling.
Confirming the source first lets you address the failure directly and prevents recurring damage.
Inspect Adjacent Fixtures
Start by inspecting the fixtures directly above and around the damaged ceiling area, since the visible stain often traces back to a source nearby rather than the leak point itself.
Check supply lines, shutoff valves, toilet seals, tub surrounds, shower heads, drains, and appliance hookups for moisture, corrosion, loose fittings, or active drips.
Test each fixture under normal operating pressure so you can spot failures that only appear when the system runs.
Look for warped trim, mineral deposits, peeling paint, and damp insulation at penetrations.
Use a flashlight and gloved hands to confirm hidden wetness around access panels and cabinet interiors.
If you share the same plumbing network, inspect neighboring rooms too.
Careful, systematic checks help your household act fast, avoid unnecessary demolition, and protect the repair plan.
Trace Water Path
Once you’ve ruled out nearby fixtures, trace the water path from the ceiling stain to the actual leak source by following gravity, framing, and penetrations.
You should map the stain’s highest edge, then inspect directly above it in the attic, crawlspace, or floor cavity. Water often runs along joists, pipes, wire bundles, and drywall seams before it drops.
Check roof valleys, flashing, vent boots, supply lines, drain lines, and condensate routes. Look for damp insulation, rust, swollen wood, mineral deposits, and active drips.
Use a moisture meter to confirm the wettest point, because the source is usually uphill from the visible damage.
When you document each step, you protect your repair plan and help your team work as one.
Stop the Water and Protect the Room
Shut off the water supply immediately to stop further intrusion and reduce structural damage.
Move valuables, electronics, and furnishings out of the affected area, then contain the leak with buckets, tarps, or plastic sheeting to limit spread.
You need to protect the room now so you can control moisture until repairs begin.
Shut Off Water
Move quickly to stop the water at its source and limit further ceiling damage.
First, locate the nearest fixture valve, appliance shutoff, or branch supply line and turn it clockwise until it seats fully. If you can’t isolate the leak locally, shut off the home’s main water valve immediately.
For active plumbing failures, also close the water heater supply if the line runs there. After the flow stops, open a lower faucet to relieve pressure in the system. You’re protecting your home’s structure and keeping your crew ready for the next step.
If the leak involves electricity near the damaged ceiling, shut off the affected circuit at the panel before you continue. Confirm that dripping has slowed or stopped completely before you move on to inspection and repair.
Move Valuables Away
With the leak under control, you should clear the area fast by moving furniture, electronics, rugs, documents, and other valuables out of the affected room.
Use two people for heavy items and lift from stable points to avoid strain or extra damage. Disconnect power before moving electronics, then place them on a dry, elevated surface.
Roll rugs carefully so moisture doesn’t spread, and keep paper items flat in a dry container. If you can, create a clear path that lets you work safely and quickly.
Group salvageable belongings together so you can inspect them later. This step protects your property, reduces cleanup time, and helps your restoration team focus on the ceiling, not the contents.
Contain The Leak
Now that the room’s clear, you can focus on stopping the water and limiting further damage. Shut off the water supply at the main valve if a plumbing line is leaking. If the source is from an appliance, close its isolation valve.
For roof leaks, place a tarp over the damaged area only if conditions are safe. Position buckets, towels, and plastic sheeting under the drip path to protect flooring and furnishings.
If water is pooling in the ceiling, puncture the lowest bulge with a small, controlled hole so it drains in one spot, not across the room. Keep power off near wet areas.
Document the leak with photos, then call a restoration professional so your home stays protected and your response stays coordinated.
Check for Mold, Rot, and Hidden Damage
Inspect the damaged area for mold, rot, and hidden deterioration as soon as the ceiling dries enough to examine safely. Use a bright flashlight and look for discoloration, fuzzy growth, musty odor, soft drywall, and stained insulation.
Probe gently with a screwdriver; if the material yields easily, you likely have decay behind the surface. Check joists, framing, seams, and fasteners for corrosion or swelling.
If the stain spreads beyond the visible patch, inspect adjacent cavities and the attic side, because water often travels before it shows. Photograph every finding and mark affected areas for repair.
When you document damage thoroughly, you stay in control and help your restoration team build a safer, cleaner result for your home and everyone in it.
Dry the Ceiling the Right Way
Dry the ceiling slowly and evenly so you don’t trap moisture inside the assembly. Set up air movers to sweep across the surface, not blast directly into one spot, and keep a dehumidifier running nearby.
You should also raise room temperature modestly, because warm air helps evaporation without stressing materials. Check humidity and moisture readings at regular intervals so you know the drying plan is working.
If you’re part of a response team, coordinate equipment placement to protect adjacent rooms and keep airflow balanced.
- Use indirect, continuous airflow.
- Maintain controlled dehumidification.
- Monitor moisture with a meter.
- Verify the cavity is drying uniformly.
Stop only when readings stabilize at dry levels. That’s how you help the ceiling recover safely and stay strong.
Repair Stains and Sagging Drywall
Once the ceiling is fully dry, you can repair residual stains and any sagging drywall before they turn into larger structural problems.
First, inspect the area for soft spots, discoloration, and fastener failure. If the stain is minor, seal it with a high-quality stain-blocking primer so it won’t bleed through paint.
For sagging drywall, remove loose material, cut back damaged edges to solid framing, and replace the affected section with matching drywall.
Secure the patch with screws, tape the seams, and apply joint compound in thin, even coats. Sand between coats, then prime and paint for a uniform finish.
You’re restoring not just appearance, but the ceiling’s integrity, and that matters in a well-maintained home.
Prevent Future Ceiling Leaks
To prevent future ceiling leaks, you’ll need to address both the roof and the systems above the ceiling before damage can recur.
Inspect shingles, flashing, and sealants after every storm, and schedule annual roof maintenance.
Test plumbing supply lines, drain joints, and HVAC condensate pans for active leaks, corrosion, or blockage.
In attics, keep insulation dry and ventilation balanced so moisture doesn’t condense on framing.
You belong with homeowners who document every repair, because records help you spot trends early.
- Replace failed flashing immediately
- Tighten or renew pipe connections
- Clean gutters and downspouts
- Monitor ceilings after heavy rain
Frequently Asked Questions
How Much Does Professional Ceiling Water Damage Repair Usually Cost?
You’ll usually pay $300 to $1,500 for professional ceiling water damage repair; severe structural, mold, or repainting work can push costs above $3,000. You should get a moisture inspection and detailed estimate first.
Will Homeowners Insurance Cover Ceiling Water Damage Repairs?
Usually, yes—if you prove sudden, accidental damage. About 1 in 20 homeowners files a water-damage claim yearly. You’ll need prompt documentation, leak source repair, and policy review to protect your coverage.
How Long Does Ceiling Water Damage Restoration Typically Take?
Usually, you’ll need 3–10 days for drying and a few more days for repairs; extensive damage can take weeks. You’ll move faster when you stop the leak, document damage, and hire qualified restoration pros.
When Should I Call a Professional Instead of Fixing It Myself?
Call a pro when you see sagging drywall, active leaks, mold, or electrical risk; when damage is widespread, hidden, or recurring; and when you can’t trace the source, you’ll protect your home and your team.
Can I Stay in My Home During Ceiling Water Damage Repairs?
Yes, you can stay home during minor repairs if the area’s dry, contained, and safe. You shouldn’t stay if there’s active leaking, mold, structural damage, or demolition; your technician will advise you.
Final Thoughts
When you spot ceiling water damage early, you cut off bigger problems before they spread. Trace the leak, stop the water, and dry the area fast so mold and rot don’t take root. Then seal stains, repair damaged drywall, and keep watch on vulnerable areas. Think of your ceiling as a shield; when you inspect and maintain it regularly, you keep small drips from turning into costly structural storms.
Recent Posts
Flood Damage Repair Vs Water Damage Restoration Explained
If a burst pipe soaks your basement overnight, you may need water damage restoration; if
When To Hire Professional Flood Damage Repair Services
If you notice standing water, soaked materials, or a persistent musty smell, you may need
Flood Damage Repair Insurance Claims: How The Process Works
When floodwater hits your home, you need to move fast and document everything before cleanup